It’s tomato planting season, which means not only that we search for the perfect tomato seedlings but, almost as important, we need the perfect way to support them as they grow. Tomatoes always seem to outgrow their cages and commercially available cages just aren’t all that attractive or effective.
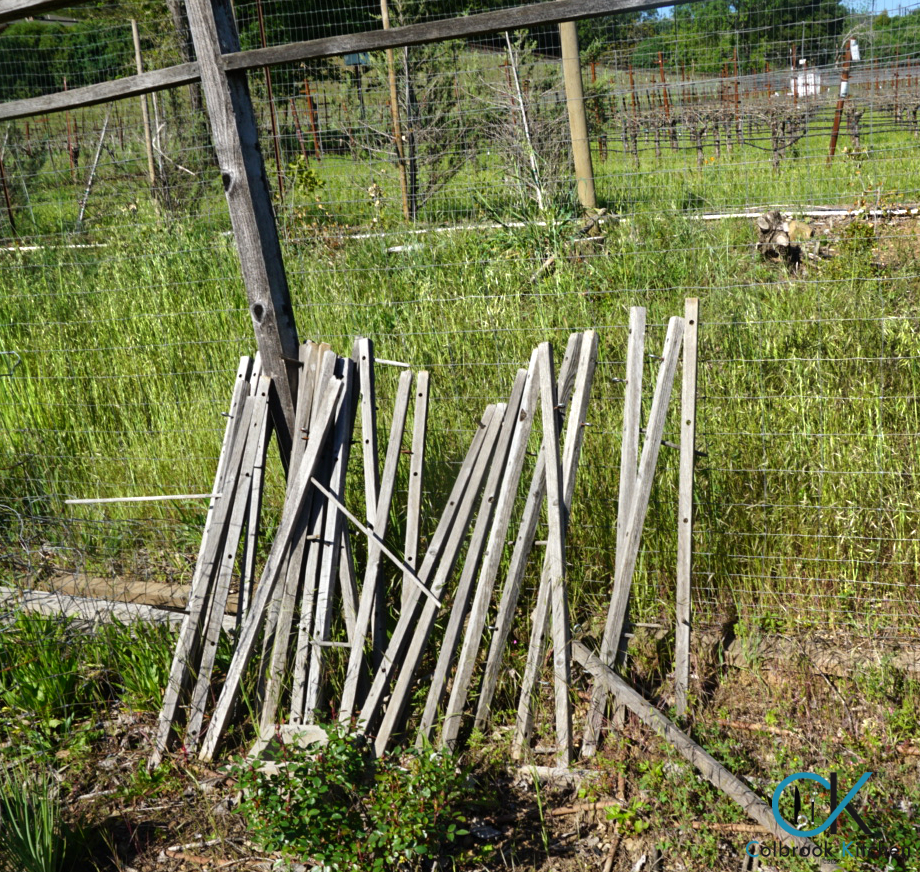
Several years ago, there was a wonderful, albeit short-lived, magazine called “Kitchen Garden” that covered everything from planting through harvesting to cooking your produce, with wonderful tips and advice. One day I voiced a long-held wish that we could find good-looking, effective tomato supports. The very next day, our latest issue of the magazine arrived and, lo and behold, (I’ve always wanted an excuse to use that phrase!) there was an article entitled “Support Your Vegetables in Style”. It recommended building a series of simple ladders that can be easily and dynamically hinged together in any configuration you want, year after year. We brought you the instructions for these ladders in a Cool Tip several years ago. We still love these ladders and there’s nothing like real wood. But fabrication can be difficult - you need to be able to drill 10 straight 1/2” holes per ladder - and wood deteriorates over time. Here is our wood ladder graveyard:
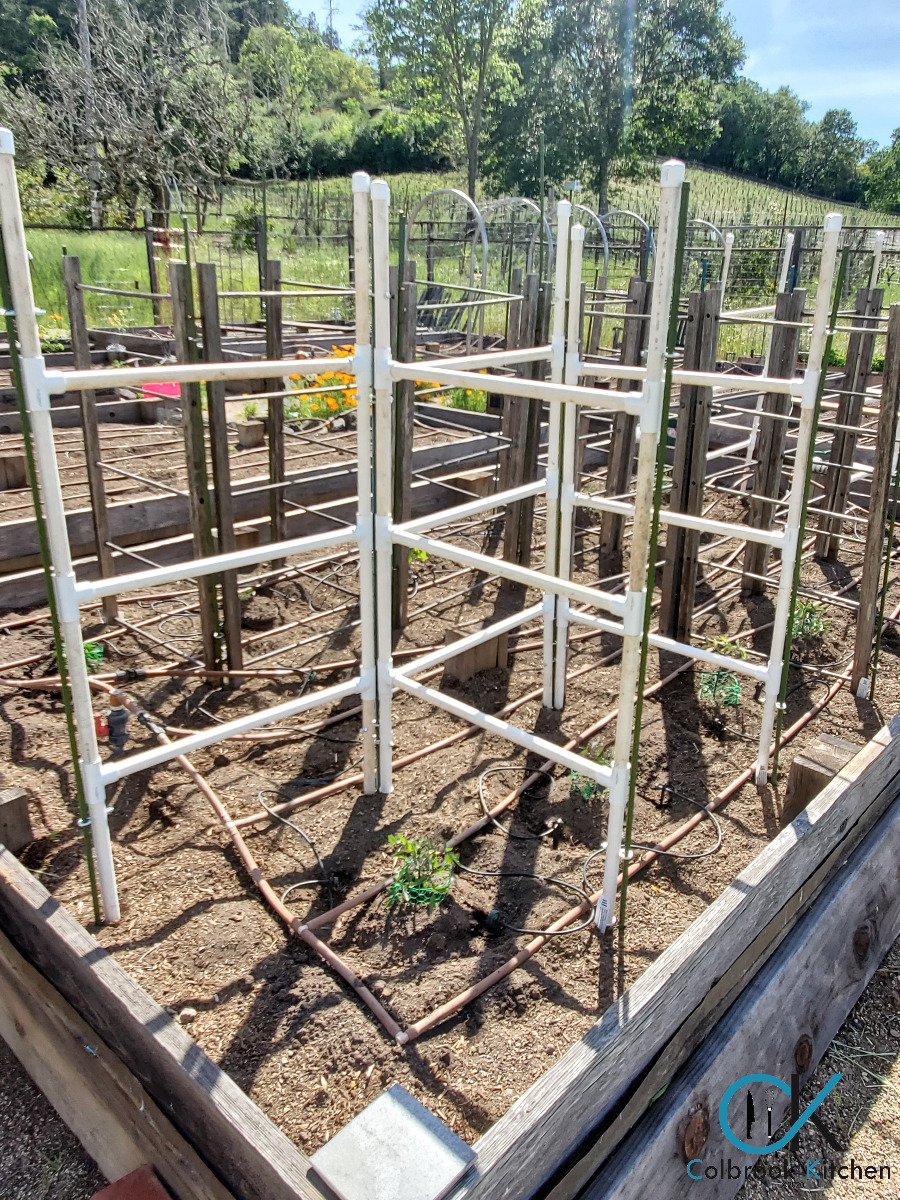
So this year we decided to try something new: it turned out to be so easy and it should last for a long, long time. The new secret ingredient is PVC pipe. We had some left over from an irrigation project, but it’s relatively inexpensive at your local hardware or ag supply store.
Here’s what you need for each ladder:
8 - 12” PVC tubes (we used 3/4” diameter pipe because that’s what we had, but 1/2” or 1” would work as well; just pick a size for all your PVC components and stick with it.)
3 - 24” PVC tubes
6 PVC T-connectors (you can get these and the caps in colors to add a little pop to the ladders)
4 PVC caps - optional, but see Step 3 below.
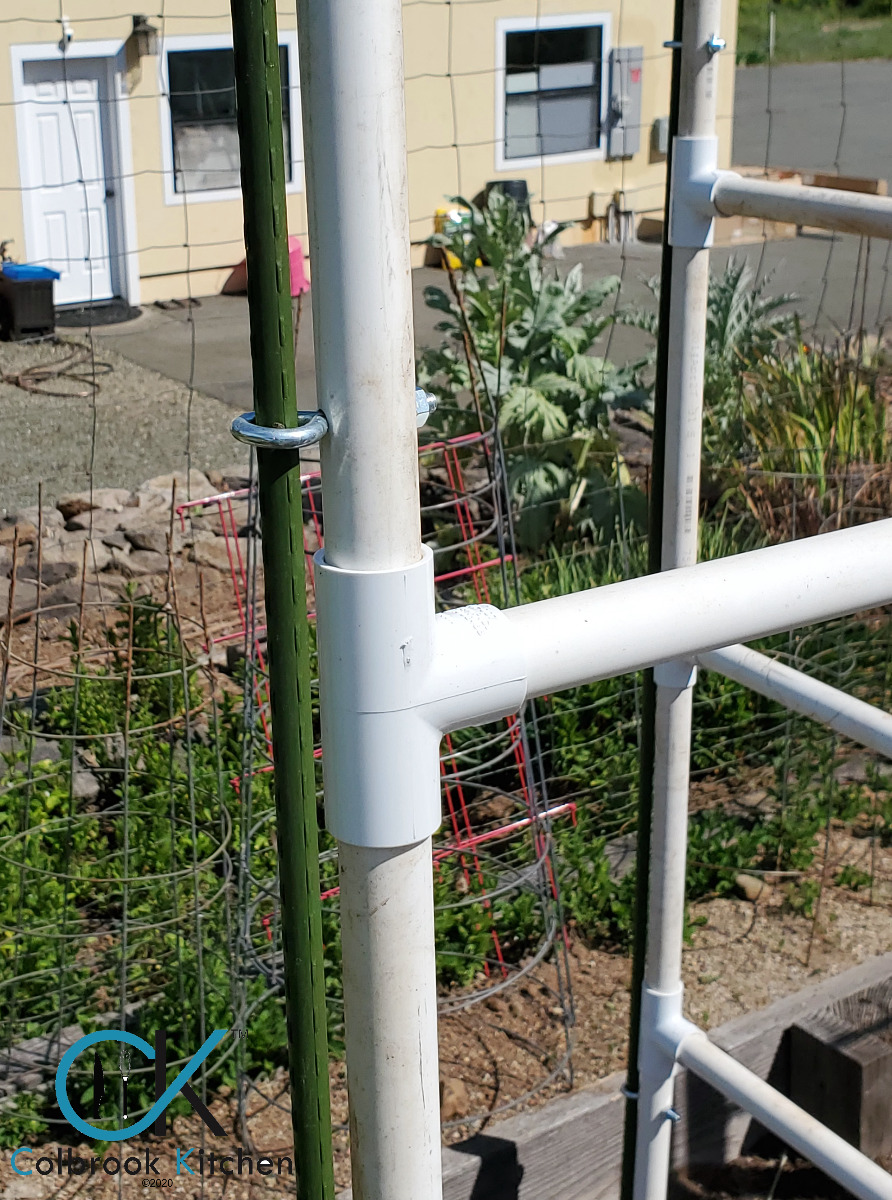
4 eyebolts with nuts (we used 1/4” x 2 1/2”)
2 - 4’ garden stakes
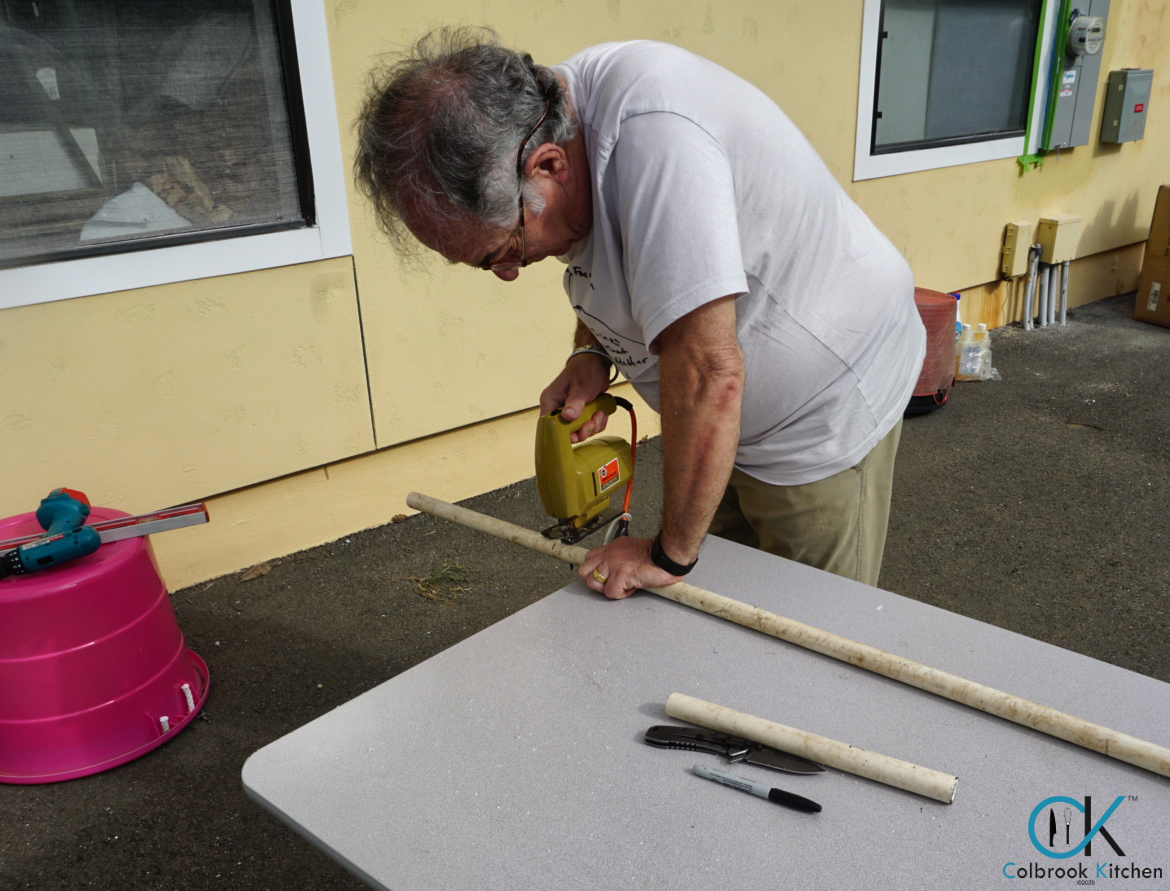
The PVC lengths don’t have to be exact, but they should be consistent. We measured one piece of each size and then used that as a template to mark the other pieces. Kennedy used an electric jigsaw (a PVC pipe cutter or a hacksaw with the right blade also will work) to cut the pieces as marked. Assembly is super easy after you have cut all of the pieces. Here’s what to do:
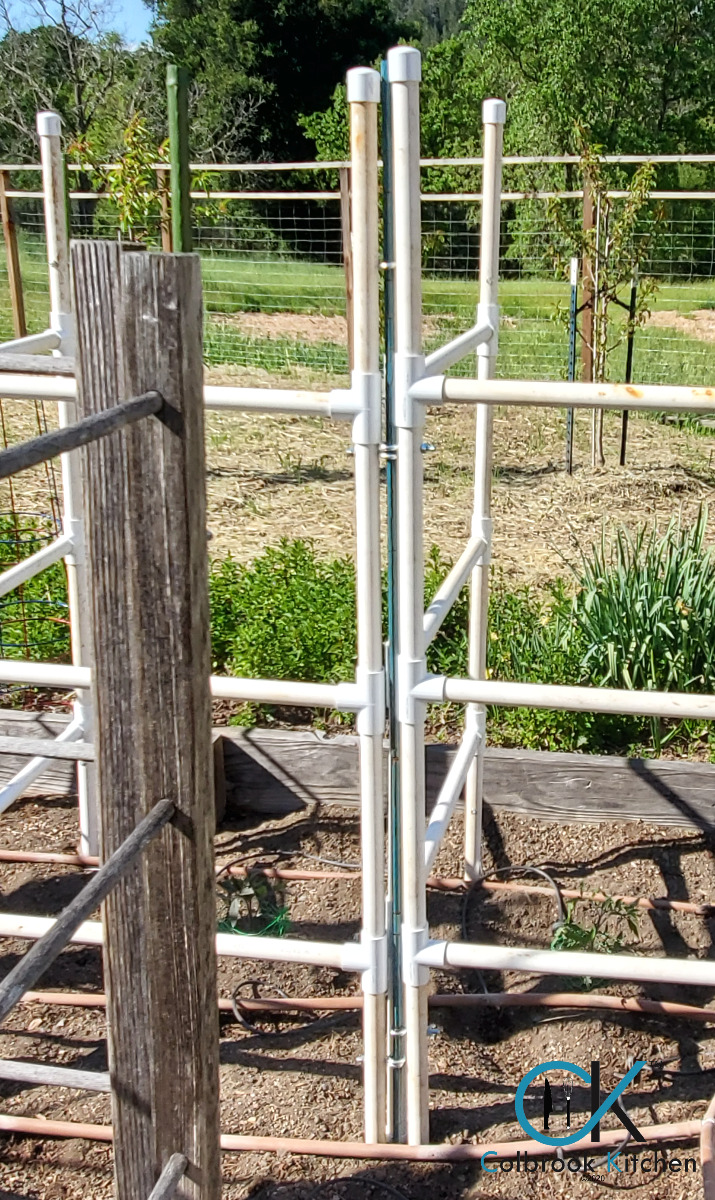
1. Line up 4 - 12” tubes interspersed with 3 T-connectors and insert the ends of the 12” tubes into the T-connectors. That’s one side of a ladder. Now do the same thing with the remaining 4 - 12” tubes and 3 T-connectors. Make sure the T-connectors are all facing the same direction. At this point, you have the 2 side pieces of the ladder.
2. Now take one of the side pieces that you just assembled and insert 3 - 24” tubes into the 3 T-connectors. Then position the remaining side over the 3 - 24” tubes and insert the ends of those tubes into the 3 T-connectors on the opposite side piece. Gently tap into place. This is how your ladder should look at this point:
3. Put the caps on the top and bottom ends of each side piece. This is optional, but it looks cleaner, it covers up uneven cuts, and it will keep critters out of the tubes.
4. This next step was a source of disagreement in our house: should we drill the holes for the eyebolts before or after assembly? You need to drill holes (we used a 9/32 drill bit to allow the eyebolts to pass through smoothly) in half of the 12” tubes, and the holes have to go through both sides of the tube. My husband held the drill, so we went with his decision to drill after assembly. You need 2 holes in each side piece: one near the top and the other near the bottom. The holes should be in line with the 24” tubes. Although the spacing is not that important, don’t drill too close to either end of the 12” tubes. (Pro tip: don’t drill the holes in the exact same place on each ladder; when you connect the ladders in Step 6, you need a little vertical space between the eyebolts.)
5. Place the eyebolts in the drilled holes with the “eye” on the outside of the ladder: parallel to the ground. Anchor the eyebolts with the nut.
6. Now, once you have several ladders made, it’s time to assemble them in your garden. Just line up 2, 3 or 4 ladders with the eyebolts together, and run the garden stakes through the eyebolts, into the ground: creating whatever configuration suits the size and shape of your tomato bed.
These ‘ladders’ will provide sturdy support to your tomato plants, and they will disassemble and store easily after you’ve enjoyed your last tomatoes of the season.